It is one of the most irritating things, when you are trying to access a website and facing the “connection time-out” error notification on your display. It is not an issue with your device or connection. This issue occurs because your website’s server is not available at the moment. Sometimes you need to wait to access your favorite website. Apply the fixes given below to solve the error

Change Original Time-Out Setting
Here are the steps to change default time-out settings:
- In the search field type “Regedit” and then launch “Registry editor.”
- Move to the given command:
- HKEY_CURRENT_USER\SOFTWARE\Microsoft\Windows\CurrentVersion\Internet Settings
- In the subkey, you need to add “DWORD,” as namely “ReceiveTimeout,” and then set the value to “seconds*100” For example: if you wish to set time-out for 9 minutes, then you need to set the value as “540000 (540*100).”
- Now restart your browser.
Adjust LAN Settings
Here are the steps to follow:
- In the search field type “internet option” and then launch “Internet Option.”
- Select the “Connections” button and then click “LAN settings.’
- You need to uncheck “Automatically Detect Settings” and then click “Use Proxy Server” for LAN.
- Now restart your browser and then check the issue resolved.
Edit Windows 10 Host File
Here are the steps to follow:
- Tap on the location “C: WindowsSystem32driversetc.”
- Locate the hosts file, right-tap on it, and launch it along with Notepad.
- At the bottom of your file, you need to check any sites listed.
- If you see any sites listed, then you need to delete them.
- Now save the hosts file.
- Restart your browser or check for improvement.
Renew DNS and IP
Here are the steps to follow:
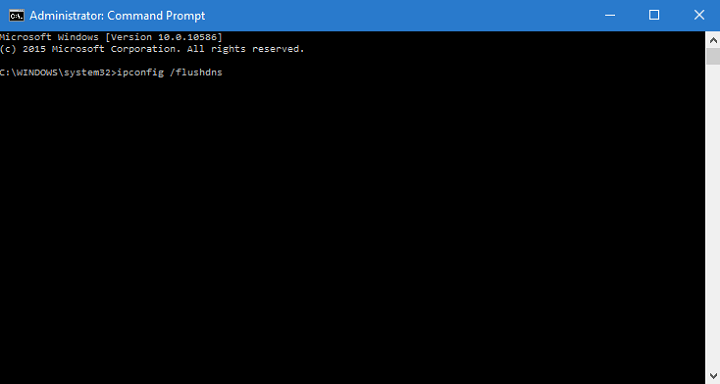
- Right-tap on the “Start” button and then click “Command Prompt” as admin.
- In the command-line you need to type given command and then hit the “Enter” button every time:
- ipconfig /flushdns
- ipconfig /registerdns
- ipconfig /release
- ipconfig /renew
- After the above process, restart your browser.
Turn off Problematic Extensions
Here are the steps to follow:
- In your browser, tap on “Menu” that appears on the upper-right corner on your screen. Select “More tools” and then hit “Extensions.”
- On your screen, the extensions list will be appearing. Now turn off the entire extension by clicking the “Enabled” box near the extensions name.
- After the above process, your entire extensions are disabled. Now restart your browser and check the issue resolved. If not, then you need to turn on the entire extension one by one to fix this issue.
Reset Browser to Default
Here are the steps to follow:
- Tap on the “Menu” that appears on the upper-right corner on your screen.
- When the “Settings” option popup, bottom down and then click “Advanced.
- Find the “Restart” option and then click on it.
- Now confirmation notification will appear on your screen; select “Reset” to proceed with your command.
- After the above process, your browser will restart, and the entire history, cookies, and extensions will be deleted or removed.
Perform Browser Compatibility Mode
Here are the steps to follow:
- Find your browser shortcut and then right-tap on it. Select “Properties” in the dropdown menu.
- A Properties Windows appears on your screen, move to the “Compatibility” button, and then select “Run this program in compatibility mode” and click Windows’s older version.
- Now tap on “Apply” and then click “OK” to save your change.
- After the above process, the issue should resolve. You can also perform compatibility mode by right-tapping on your browser and then select “Troubleshoot Compatibility” in the dropdown menu.
Make Sure Browser Is Up To Date
Here are the steps to follow:
- Tap on the “Menu” button that appears on the upper-right corner on your screen and then select “Help” and click “About Google Chrome.”
- After the above process, your browser will automatically check for updates and install them.
Clear Browsing Data
Here are the steps to follow:
- Tap on the “Menu” button and then select “settings.” In the settings, bottom down and select “Advanced.”
- Select the “Privacy & Security” option and then click “Clear browsing data.”
- Now set “Clear the following item” to the starting of time.
- Remember that “Browsing history, cookies, cached files and image, and other site data” and the “Hosted application data” button are selected.
- Now tap on the “Clear browsing data” option.
Use Google DNS
Here are the steps to follow:
- Tap the Windows + R button on your keyboard to launch the Run command prompt.
- In the run command-line, type “ncpa.cpl” and then hit the “Enter” button on your keyboard.
- Now right-tap on the network connection and then select “Properties” in the dropdown menu.
- Click “Internet Protocol Version 4 (TCP/IPv4)” and then select “Properties.”
- Select “Use the following DNS server” in the properties windows. Now type “8.8.8.8” as preferred DNS and “8.8.4.4.” as alternative DNS—select “OK” to save your change.


